Learn how to draw a shark the easy way, from basic shapes to fins, a tail, and toothy grin. A beginner-friendly, step-by-step guide with no experience needed.
A shark looks fast and fierce, but underneath it's built from a few simple shapes: a long body, a couple of triangle fins, and a sweeping tail. In this guide you'll learn how to draw a shark step by step, starting with a light body curve and finishing with a toothy great white grin. No experience needed, and the same easy method works for a cartoon shark or a more detailed one.
Keep your early strokes light so you can fix the shape before adding teeth. Let's begin.
What you'll need
- A pencil and an eraser
- Plain paper
- Optional: a black pen for outlining, plus crayons or markers to color
How to draw a shark step by step
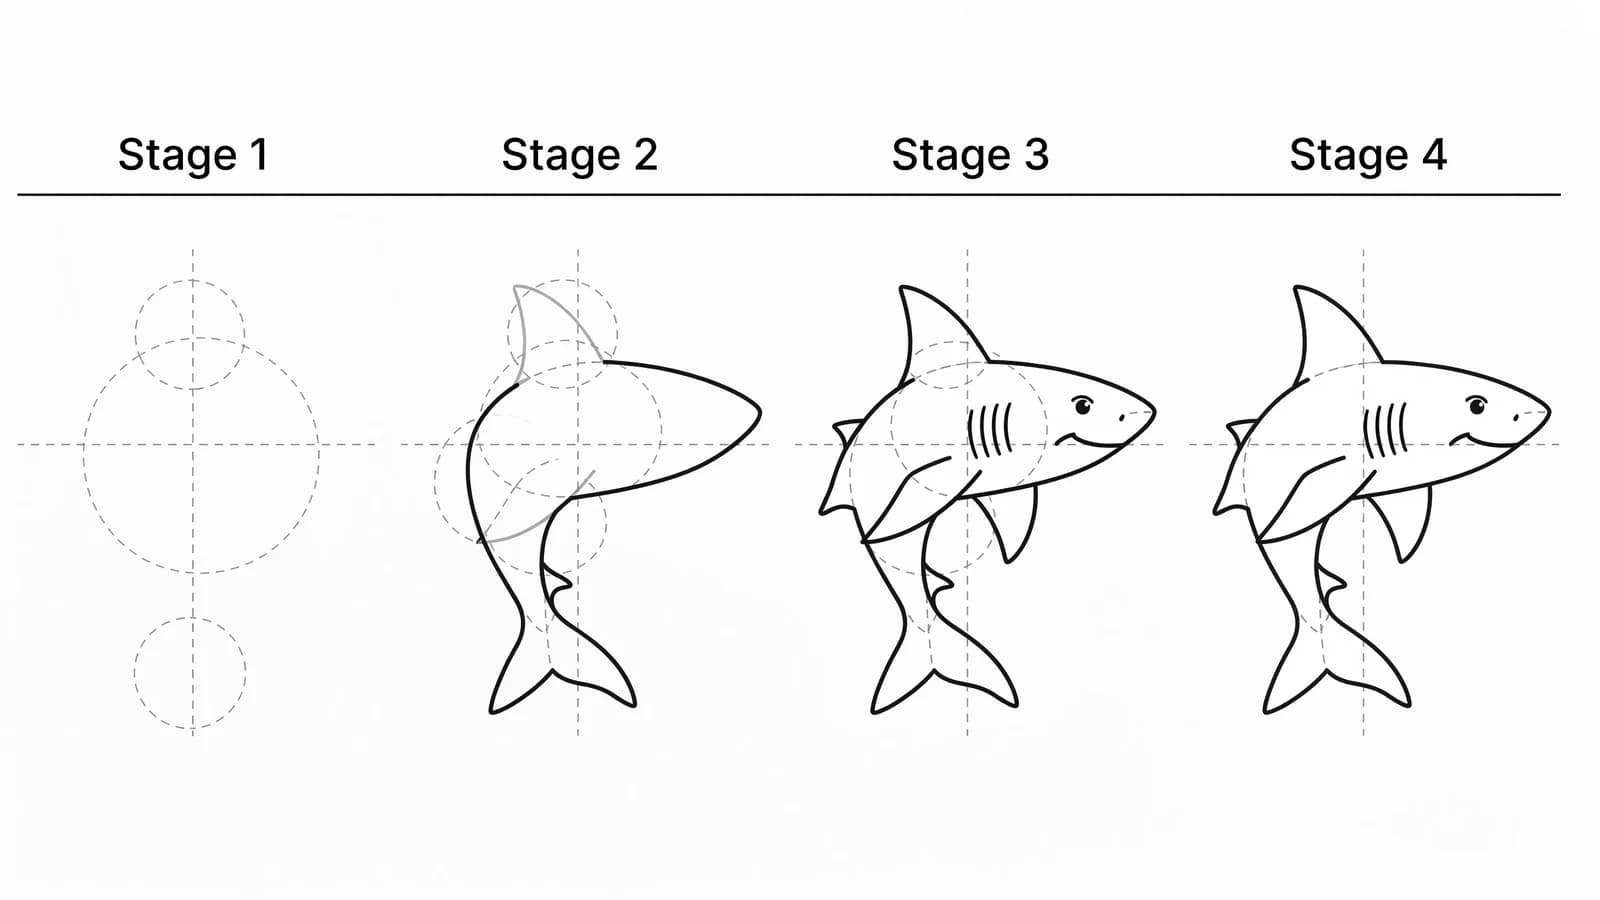
Step 1: Block in the basic body
Start with a long, light curve across your page for the shark's spine, then build a rounded torpedo shape around it, wider near the front and tapering toward the tail. Don't aim for the finished shark yet. The Plaid tutorial advises starting with basic shapes instead of trying to draw the shark as you see it, because it's easier to refine simple geometric forms as you go. The Monterey Bay Aquarium activity says the same: think of the shark as a collection of basic shapes like circles, triangles, and ovals.
Step 2: Add the pointed snout and mouth
At the front of the body, pull the shape into a slightly pointed snout. Underneath the snout, draw a wide curved line for the mouth. A great white's mouth sits low on the underside of the head, so place it below the tip rather than right at the front.
Step 3: Draw the top fin
On top of the body, draw the famous triangle dorsal fin, the one that sticks up out of the water. Make the front edge taller and let the back edge curve down toward the tail. This single fin instantly makes your drawing read as a shark.
Step 4: Add the side and belly fins
Add a pointed pectoral fin on the side, near the front, angled down and back. Add one or two smaller fins along the belly toward the back. Keep early strokes light so you can adjust their placement before committing.
Step 5: Draw the tail
At the back, draw the tail fin as two triangles meeting at the body, with the top point taller than the bottom one. This crescent-moon shape is what gives a shark its powerful look.
Step 6: Add the face and gills
Add a small round eye near the top of the snout, and a small dot nostril below it. Just behind the head, draw five short curved lines for the gill slits. These little details bring the shark to life.
Step 7: Add the teeth and details
Inside the mouth, draw a row of small triangle teeth along the top and bottom. Add a curved line along the side of the body to separate the darker gray top from the white belly. Don't worry about perfect teeth; a few even triangles do the job.
Step 8: Outline and color
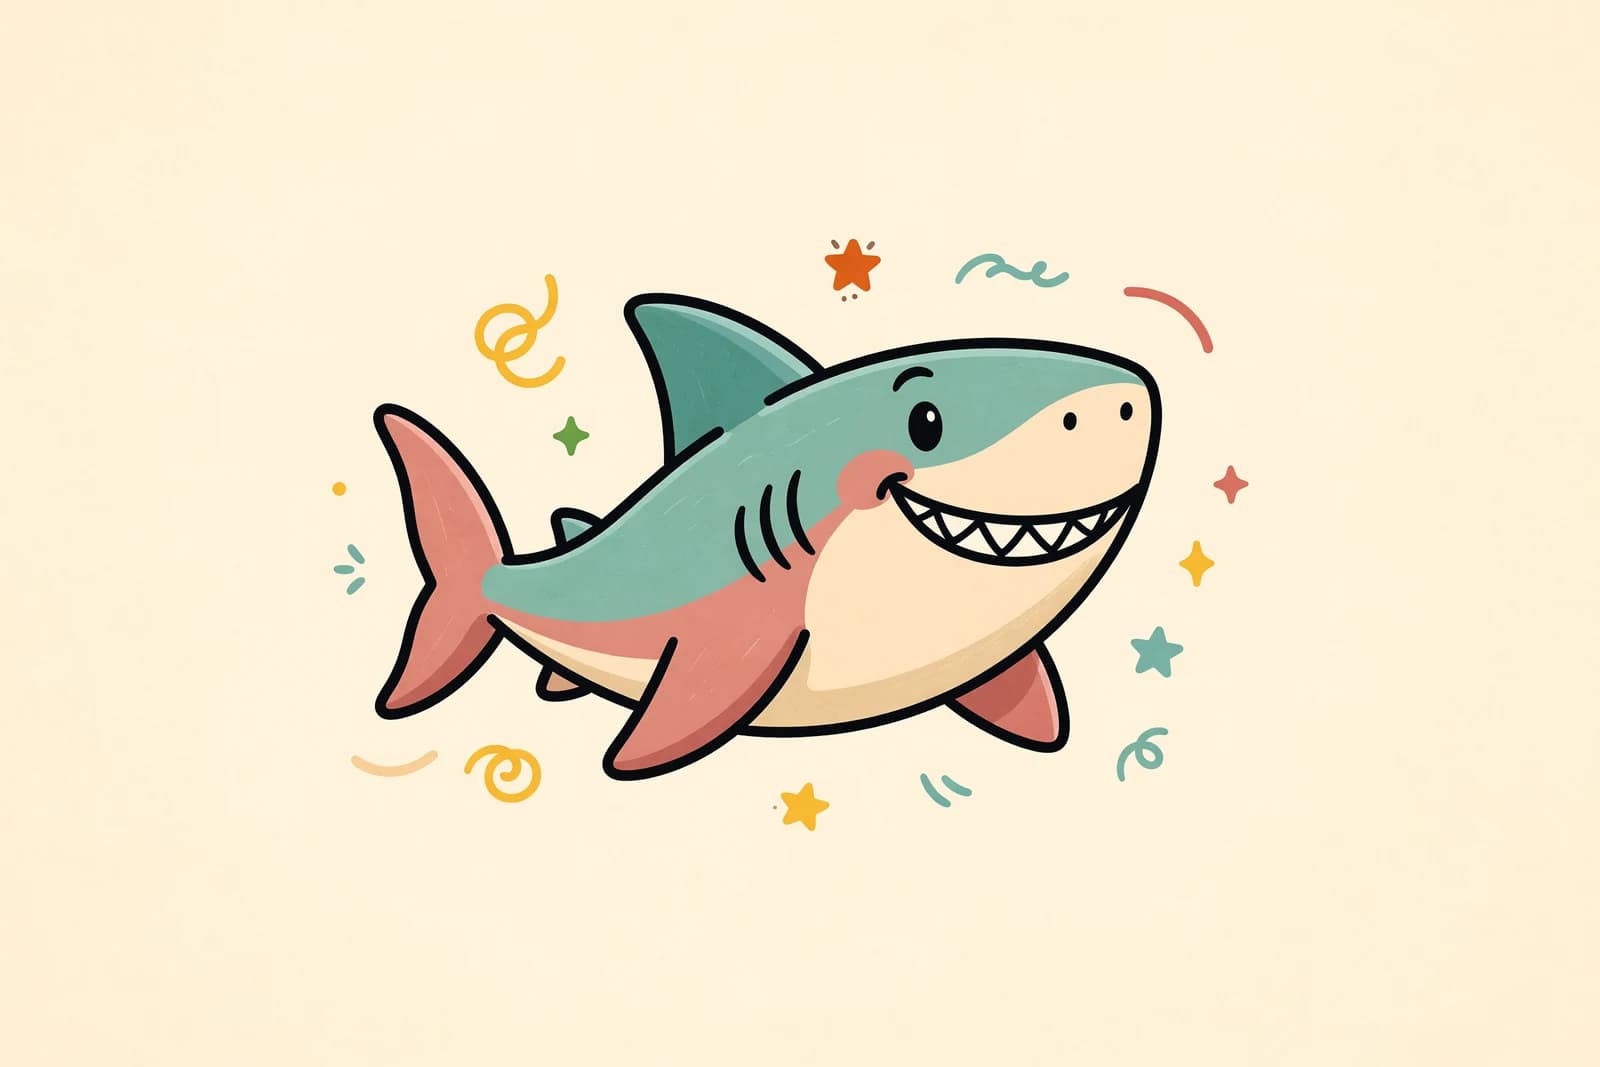
Trace the lines you want to keep with a firmer stroke or a pen, then erase your construction guides. Color the top of the shark gray and leave the belly white, the classic great white look. Add a few water lines or bubbles around it for an underwater scene.
What artists recommend (and common mistakes)
- Start with basic shapes. Both Plaid and the Monterey Bay Aquarium begin by breaking the shark down into circles, triangles, and ovals before refining. Build the simple form first, then sharpen it.
- Work from general to specific. The Plaid tutorial says to draw from the general to the specific once you start adding detail, so the big body and fin placement come before the small stuff.
- Keep early strokes light. How2DrawAnimals tells beginners not to press hard at first but to use light, smooth strokes so mistakes are easy to erase.
- Common mistake: perfecting the teeth and eyes before the body shape and fins are right. If the overall form is off, no amount of detail will fix it. Nail the simple shapes and fin placement first, then add the teeth last.
Fun variations to try
- Cartoon shark: Make the body chunky, the eyes big, and the grin friendly instead of fierce.
- Hammerhead shark: Swap the snout for a wide T-shaped head with an eye on each end.
- Baby shark: Shrink everything, round off the fins, and give it an extra-big smile.
- Shark in the water: Draw a wavy waterline so only the dorsal fin and snout poke above the surface.
Frequently asked questions
How do you draw a shark easy? Start with a long torpedo body, add a pointed snout, then a triangle top fin, side fins, and a crescent tail. Finish with an eye, gill slits, and a row of teeth. Building from simple shapes keeps it easy.
How do you draw a great white shark? Use a torpedo-shaped body with a gray top and white belly, place the mouth low on the underside of the snout, and add a tall triangle dorsal fin. The two-tone color and low mouth are what make it a great white.
What shapes make up a shark? A long torpedo or oval body, triangles for the fins and tail, and a few small curves for the snout and gills. Almost the whole shark is built from ovals and triangles.
Keep drawing and coloring
Sharks rule the ocean, so give yours some company with how to draw a fish, then add how to draw a turtle for a full underwater scene. For more inspiration check out our animal drawing ideas list, and print our free animal coloring pages when you're ready to color.