Learn how to draw a lion the easy way, from a simple circle and guide lines to a full mane and friendly face. A beginner step-by-step guide, no experience needed.
The lion is the king of the jungle, and the good news is that he is built from shapes you already know. In this guide you will learn how to draw a lion step by step, starting with a single circle and a couple of light guide lines, then wrapping a big fluffy mane around a friendly face. This works for an easy lion drawing, a close-up lion face drawing, or a cute lion drawing, and you need no experience at all.
We will draw a front-facing lion head because the mane makes it forgiving and fun. Keep your lines light at first, then darken the ones you love at the end. Let's begin.
What you'll need
- A pencil and an eraser
- Plain paper
- Optional: a black pen for outlining, plus crayons, markers, or colored pencils
How to draw a lion step by step
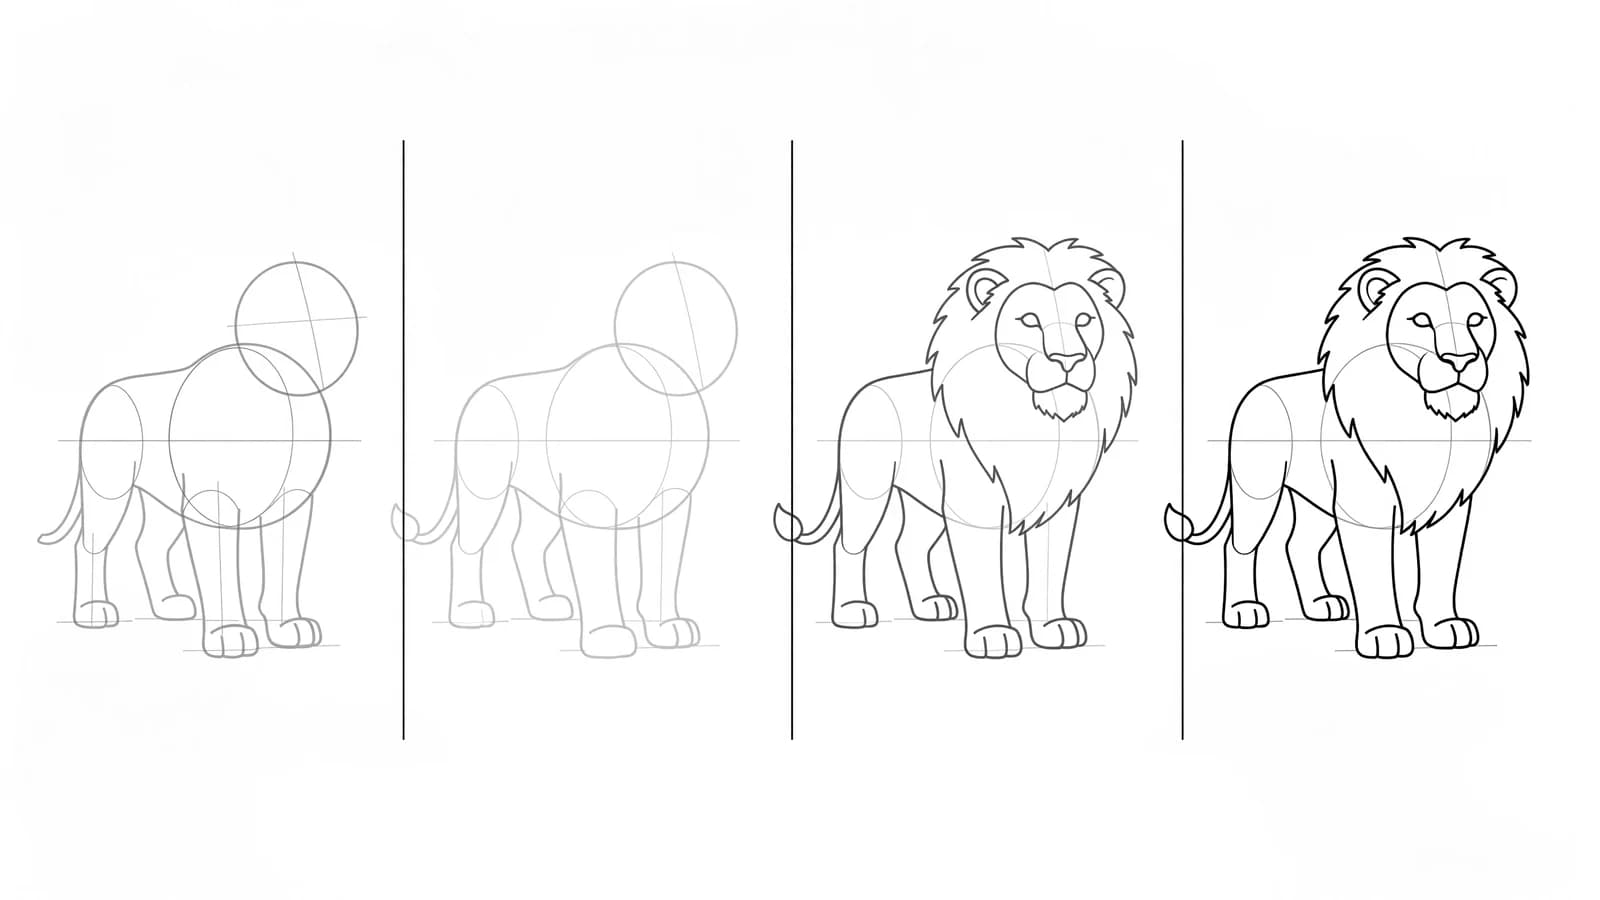
Step 1: Draw the head circle and guide lines
Draw a circle in the middle of your paper for the lion's face. Then add a light vertical line down the center and a light horizontal line across the middle. Blocking the head in with a circle and center lines first is the trick most lion tutorials start with, because the guides keep the face even and help you place the eyes and nose later, as shown in this Studio Wildlife lesson and this Cartooning Club step-by-step. Keep all of this light.
Step 2: Add the muzzle and nose
On the lower half of the face, draw two soft bumps side by side for the muzzle, like a wide letter "M" or a little heart shape. Put a rounded triangle nose right where the bumps meet, sitting on your center line. The muzzle is the anchor for the whole face, so take your time here.
Step 3: Draw the eyes and brows
Place two eyes on the horizontal guide line, one on each side of the center. Add small curved brows above them. For a cute lion drawing, make the eyes big and round and set them a little low. For a proud, fierce lion, narrow the eyes and tilt the brows down toward the nose.
Step 4: Add the mouth and chin
From the bottom of the nose, draw a short line straight down, then split it into two curves that form a smile, like the bottom of a heart. Add a rounded chin under the mouth. A couple of tiny dots on the muzzle give you the spots where a lion's whiskers grow.
Step 5: Draw the ears
Add two small rounded ears poking out near the top of the head circle, one on each side. Lions have smaller, rounder ears than cats, and most of them will be hidden by the mane, so keep them simple.
Step 6: Wrap the mane around the face
Now the fun part. Draw a big wavy ring all the way around the head for the mane, like a fluffy cloud or a sun with soft points. Make the edge bumpy and uneven, not a smooth circle. The mane should be wider at the sides and bottom. A good tip here is to draw your fur as clumps, not single hairs, which keeps the mane looking full instead of scratchy (Studio Wildlife).
Step 7: Outline and erase guide lines
Trace the lines you want to keep with a firmer stroke or a black pen, then erase the center and horizontal guides and any leftover marks. Add a few short fur lines pointing outward along the mane to give it texture.
Step 8: Color your lion
Color the face a warm golden tan and the mane a deeper orange or brown. Build the color up gradually in light layers rather than pressing hard once, the way wildlife artists shade to keep the fur soft (Studio Wildlife). Leave the muzzle and chin a little lighter for a finished look.
What artists recommend (and common mistakes)
- Start with the circle and guide lines. The most common mistake is drawing the outline of the whole lion at once. The circle plus center lines keep the eyes, nose, and mouth lined up, which is why beginner lessons begin there (Cartooning Club).
- Draw the mane as clumps, not hairs. Trying to draw every single hair makes the mane look scratchy and overworked. Group the fur into soft, pointed clumps instead (Studio Wildlife).
- Build color in light layers. Pressing down hard right away flattens the fur. Shade lightly first, then deepen the shadows around the mane and under the chin.
- Keep the mane uneven. A perfectly smooth ring looks like a plate. A bumpy, wavy edge looks like real fur.
Fun variations to try
- A cute lion cub: Make the head bigger and the mane small and fuzzy, with extra-large round eyes.
- A roaring lion: Open the mouth wide, show a few teeth, and tilt the brows down for a fierce look.
- A side-view lion: Draw the face in profile with the mane flowing behind, and add the body sitting tall.
- A lioness: Skip the mane entirely for a sleek female lion with a smooth, rounded head.
Frequently asked questions
How do you draw a lion for beginners? Start with a circle for the face and a light cross of guide lines, then add the muzzle, eyes, ears, and a wavy mane around the outside. Building from a circle keeps the face even, which is why most beginner lessons start there.
How do you draw a cute lion? Make the head round, the eyes big and set a little low, and the mane soft and fluffy. Cute comes mostly from large eyes and rounded shapes, so keep every line gentle and avoid sharp angles.
How do you draw a lion's mane? Draw a wide, wavy ring around the head with a bumpy, uneven edge, wider at the sides and bottom. Sketch the fur as clumps rather than individual hairs so it looks full and soft.
Keep drawing and coloring
Once your lion is roaring, give him some company. Try how to draw a tiger for another big cat, or how to draw a bear for a different furry friend. For more ideas, browse our easy animals to draw list, then print our free animal coloring pages to fill a whole savanna with color.