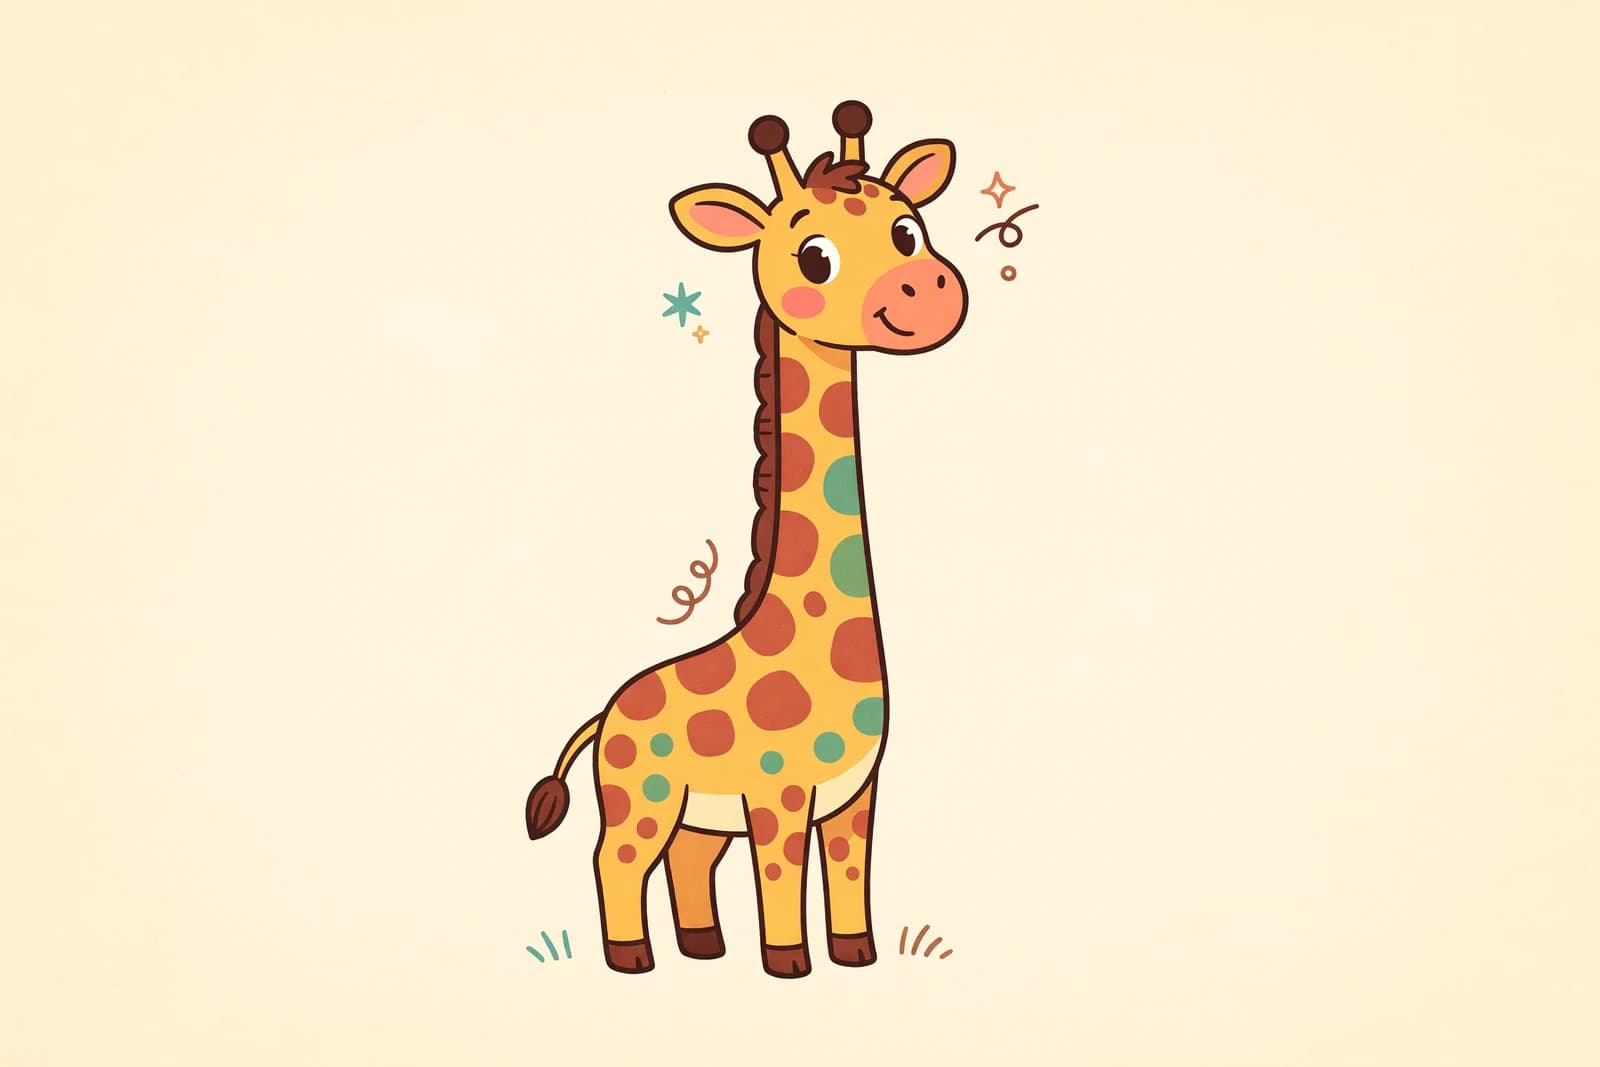
Learn how to draw a giraffe the easy way, from a long neck and oval body to horns, spots, and a sweet face. A beginner-friendly, step-by-step drawing guide.
Giraffes look tricky because of that famous long neck, but they are actually a gift for beginners: the neck is just two tall lines, and the rest is friendly ovals and a patchwork of spots. In this guide you'll learn how to draw a giraffe step by step, starting with a few light shapes and finishing with a cute, spotted body. This is an easy giraffe drawing that any beginner can follow, and the long neck does most of the work for you.
We'll draw a standing giraffe in side view, which is the clearest pose to learn. Keep your lines light at first, then darken your favorites at the end. Let's begin.
What you'll need
- A pencil and an eraser
- Plain paper
- Optional: a black pen for outlining, plus crayons, markers, or colored pencils
How to draw a giraffe step by step
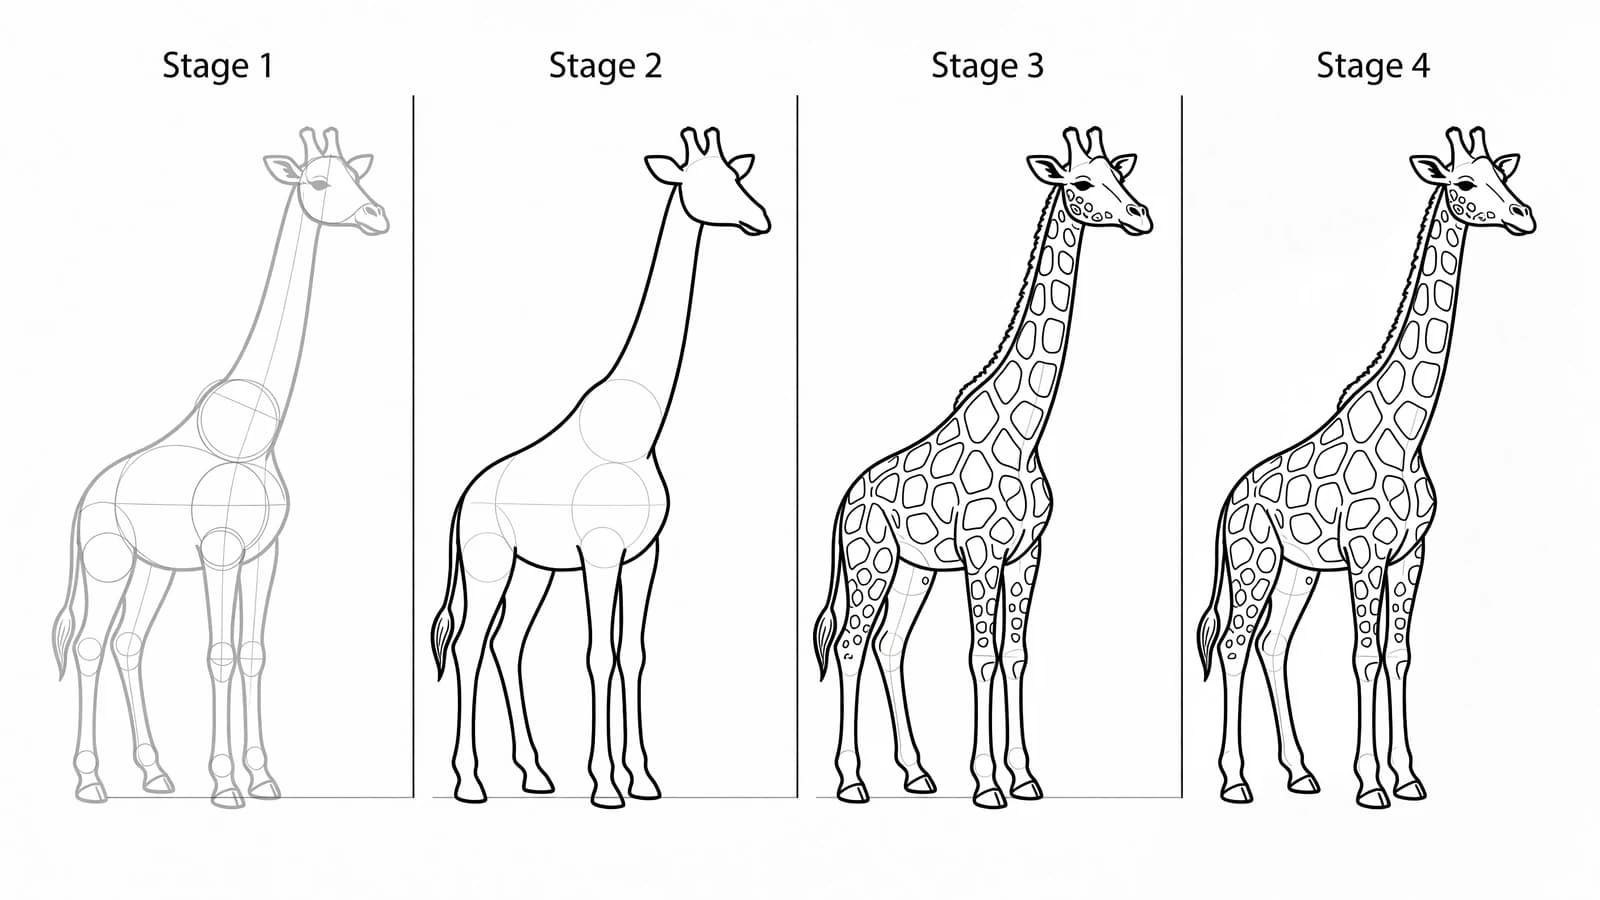
Step 1: Block in the body
Low on your page, draw a light oval for the body, a little wider than it is tall. Leave plenty of room above it, because the neck and head need a lot of height. Elementary art teacher Julia Forsyth of Wow Art Project reminds beginners that "any completed drawing can be broken down into several smaller, easily achievable drawing steps made up of lines, shapes, and personal details." The body oval is your first easy shape.
Step 2: Draw the long neck
From the top front of the body, draw two long lines sweeping up and slightly forward for the neck. Giraffe necks are tall but not super thin, so keep the two lines a comfortable width apart. This single shape is what makes your drawing read as a giraffe right away.
Step 3: Add the head and horns
At the top of the neck, draw a small head, a rounded shape a bit like a gentle wedge with a slightly longer snout. Add two little horns, called ossicones, on top, each ending in a small round bump. Then add two small ears poking out to the sides just below the horns.
Step 4: Draw the face
Add a large oval eye with long lashes, a couple of nostril dots near the end of the snout, and a soft curved mouth. Giraffes have big, calm eyes, so make the eye generous and set it high on the head for a sweet expression.
Step 5: Add the legs
Draw four long, straight legs coming down from the body, like tall posts, with small split hooves at the bottom. Because the giraffe stands in side view, set the two far legs slightly behind and a touch thinner than the near pair. Keep them simple and even in length.
Step 6: Draw the tail and mane
Add a thin tail hanging down from the back of the body, finishing in a little tuft of hair. Then draw a short, ruffled mane running up the back of the neck as a row of little bumps. These details bring your giraffe to life.
Step 7: Outline, add spots, and erase your guides
Trace the lines you want to keep with a firmer stroke or a black pen, then erase the leftover guide marks. Add the giraffe's signature spots: rounded, slightly jagged patches that fit together like puzzle pieces, smaller on the legs and bigger on the body. Tracing in ink and then erasing pencil, the way teacher Tracie Koetje shows in her giraffe lesson, makes the finished drawing look much neater.
Step 8: Color your giraffe
Color your giraffe any way you like. The classic look is a warm tan or golden body with brown spots and a cream belly. A cute cartoon giraffe can be soft yellow with orange patches, or any fun color you choose.
What artists recommend (and common mistakes)
- Break it into simple shapes. Julia Forsyth's lesson is built on turning the whole giraffe into a handful of easy lines and shapes. Block in the body, neck, and head before any spots.
- Leave room for the neck. The most common beginner mistake is drawing the body too high and running out of space, so the neck comes out stubby. Place the body low and keep the head near the top of the page.
- Ink, then erase. Going over your final lines in pen and erasing the pencil guides, as Tracie Koetje teaches, makes the drawing look clean and finished.
- Mileage matters. Drawing instructor Kimon Nicolaïdes put it plainly in The Natural Way to Draw: "The sooner you make your first five thousand mistakes the sooner you will be able to correct them." Your second giraffe will already be better than your first.
Fun variations to try
- A cute baby giraffe: Shorten the neck a little, make the head and eyes bigger, and add wobbly knees for a newborn look.
- A bending giraffe: Curve the neck down toward the ground or a bush, as if it's reaching for leaves.
- A giraffe peeking: Draw just the head and the top of the long neck rising up from behind a line, like it's peeking over a fence.
- A different pattern: Try bigger, blockier spots, or tiny dots, to give your giraffe its own coat.
Frequently asked questions
How do you draw a giraffe for beginners? Start with an oval body placed low on the page, add a long two-line neck, then a small head with horns, ears, legs, a tail, and finally the spots. Breaking the giraffe into simple shapes first, as kids' art teachers do, keeps it easy and in proportion.
How do you draw a giraffe's neck? Draw two long lines sweeping up and slightly forward from the front of the body, kept a steady width apart. Place the body low on your page first so you have enough room for the neck to be nice and tall.
How do you draw a cute giraffe? Make the head and eyes a little bigger, shorten the neck slightly, and round off the body and legs. Big eyes, soft shapes, and gentle horns are what make a giraffe drawing look cute.
Keep drawing and coloring
Once your giraffe is standing tall, give it some safari friends. Try how to draw a bird or how to draw a cow next, browse our animal drawing ideas for more, then print our free animal coloring pages to color a whole zoo of your own.