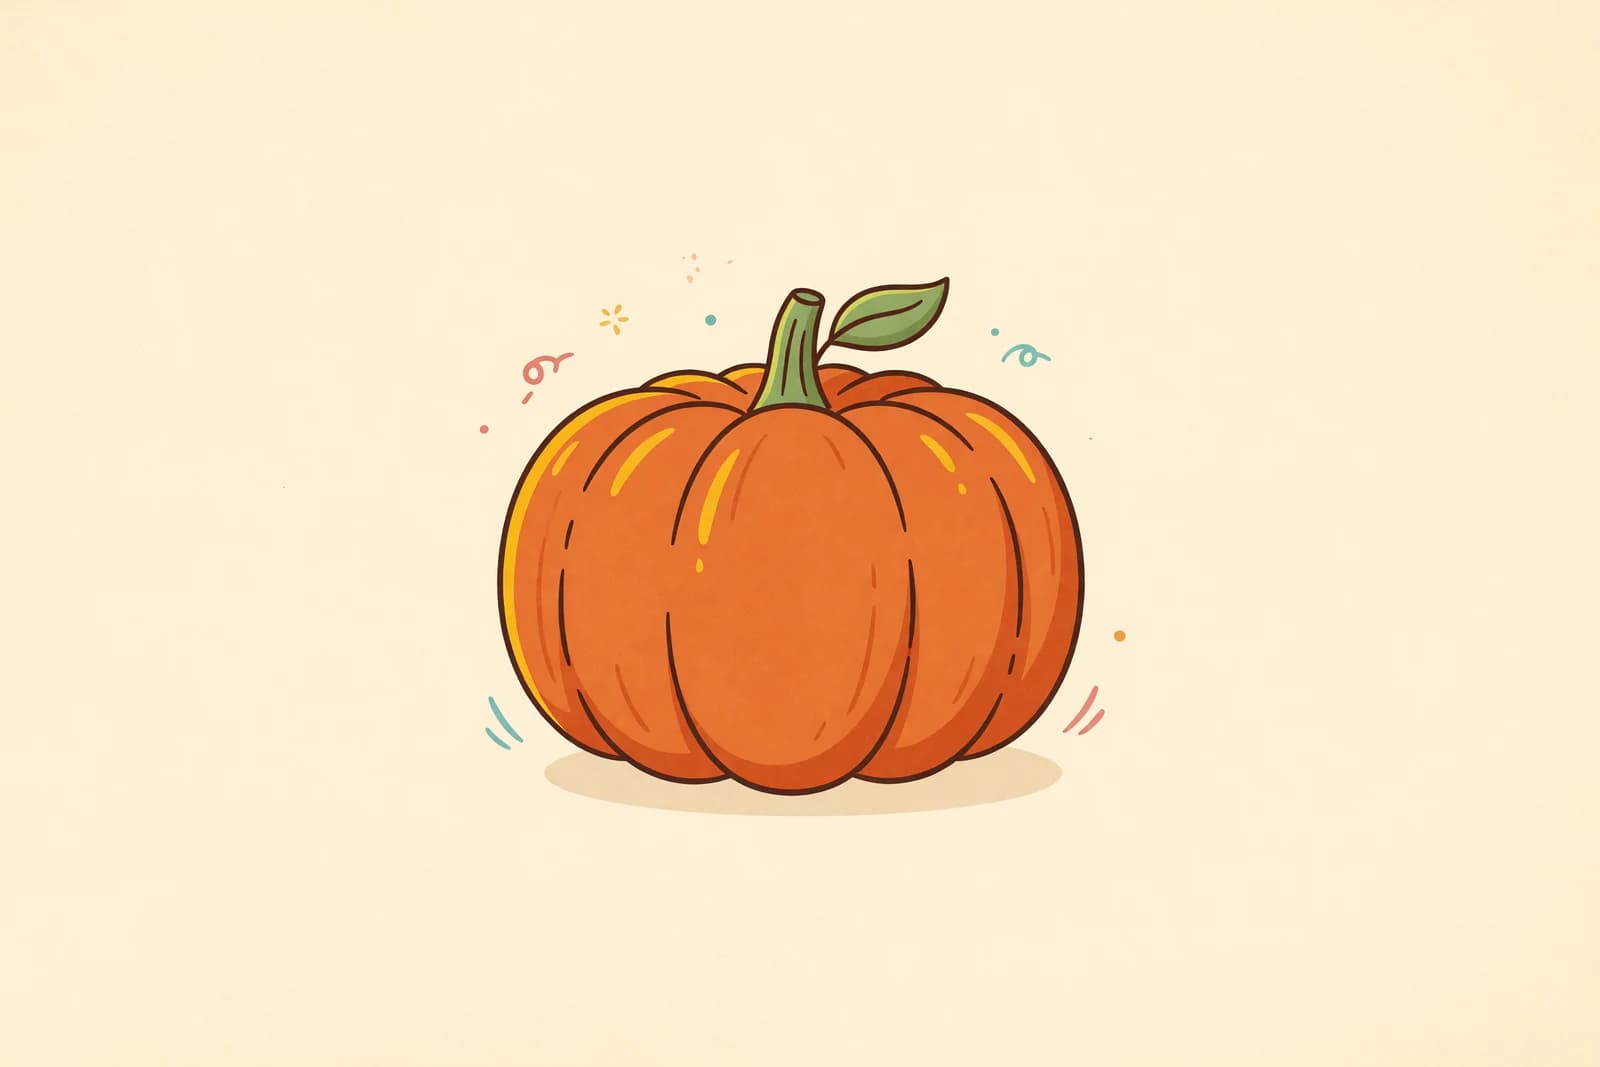
Learn how to draw a pumpkin the easy way, from a round body to curved ribs and a chunky stem. A beginner step-by-step guide, plus a cute jack-o'-lantern face.
A pumpkin is one of the friendliest things to draw all autumn long, and it starts from a single round shape. In this guide you'll learn how to draw a pumpkin one calm step at a time, building from a light guide oval to curved ribs that make it look plump and three-dimensional. We'll finish with a cute jack-o'-lantern face so you can turn your easy pumpkin drawing into a Halloween one. No experience needed and no fancy supplies. If you can draw a curved line, you can draw a pumpkin.
We'll keep every line light at first so the shape is easy to fix, then darken the lines you love at the end. Grab a pencil and let's begin.
What you'll need
- A pencil (any pencil works)
- An eraser
- Plain paper
- Optional: a black pen for outlining, plus crayons, markers, or colored pencils in orange, green, and brown
How to draw a pumpkin step by step
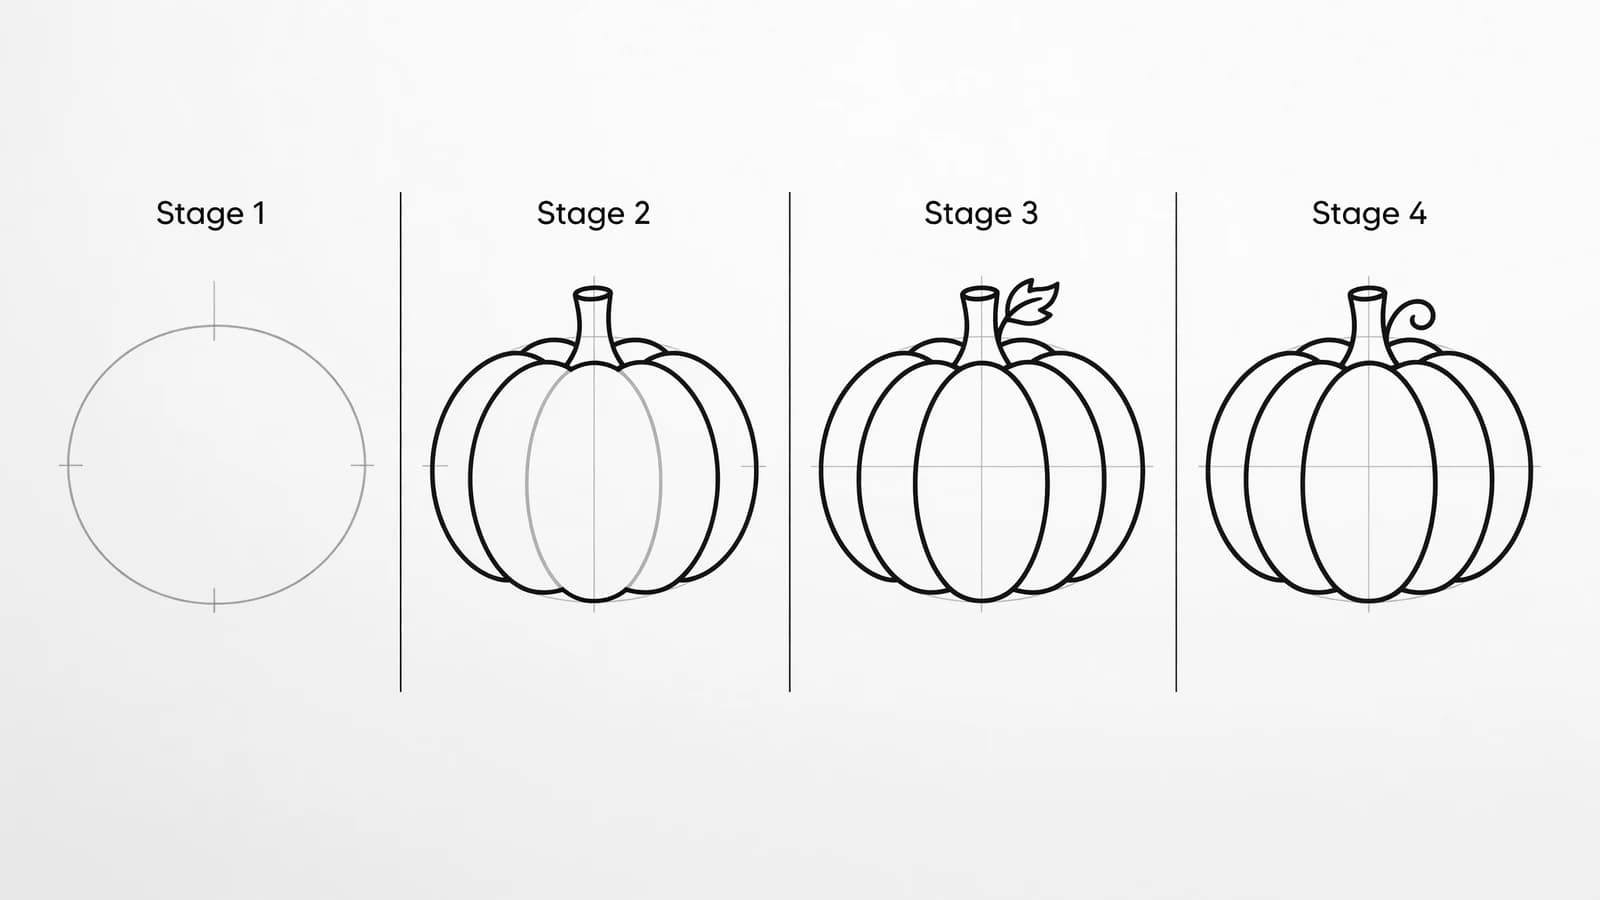
This is the foundation-first method most pumpkin tutorials use: a light oval and center line first, then curved ribs to build volume. Illustrator Shihori Obata sketches the whole pumpkin in pencil first, drawing an oval and radiating curved lines for the ribs, then erases the construction lines later. We'll follow that same order.
Step 1: Draw a light guide oval
In the middle of your paper, draw a wide oval, pressing very lightly. A pumpkin is usually wider than it is tall, so make your oval a little squashed. This is just a fence for the overall size and will become the center rib.
Step 2: Add a center line
Draw one curved vertical line down the middle of the oval, bulging out slightly on each side rather than running straight. This center rib is the closest part of the pumpkin to you, and it's the anchor for all the other ribs.
Step 3: Draw the curved ribs
On each side of the center line, add curved ribs that bow outward and then tuck back in at the top and bottom. Add one or two on each side. The key is that these lines curve around the form, like stripes wrapping a ball, which is what makes a pumpkin look round instead of flat. The Yummy Mummy Kitchen tutorial tells beginners to draw curved vertical lines from the stem outward to create the ridges, then adjust the outline so it's a bumpy pumpkin shape and not just a plain oval.
Step 4: Shape the bumpy outline
Now firm up the outer edge. Instead of one smooth oval, let the outline dip in slightly between each rib so the pumpkin has gentle bumps. Real pumpkins are a little lumpy, and those small dips between the ribs make yours look real instead of like a flat symbol.
Step 5: Add the stem
At the top center, draw a short, chunky stem. Make it a little crooked and wider at the bottom where it meets the pumpkin. A couple of curved lines on the stem give it bark texture. A small curl of vine off to one side is a nice extra touch.
Step 6: Erase the guides and clean up
Erase any leftover construction marks and the parts of the first oval you don't need. Shihori Obata recommends doing every step in pencil first for this reason, then going over the final lines in ink only once you are happy. Your clean pumpkin outline is now ready.
Step 7: Add a jack-o'-lantern face (optional)
To make a jack-o'-lantern, draw two triangle eyes, a small triangle nose, and a wide grin with a couple of square teeth. Keep the face on the front center rib so it sits flat on the pumpkin. For a cute pumpkin instead of a spooky one, use round eyes and a little smile.
Step 8: Darken your lines and color it in
Trace the outlines you want to keep with a firmer stroke or a black pen, then erase stray guide lines. Color the body orange, with a darker orange in the rib dips for shadow and a lighter orange where light hits. Make the stem brown and add a green vine. Your pumpkin is done.
What artists recommend (and common mistakes)
A few habits separate a round, real-looking pumpkin from a flat one. Here is what drawing teachers say:
- Start with a light oval and center line. Shihori Obata blocks in the oval and ribs lightly in pencil first so the construction lines can be erased later. Light guides let you fix the size and shape before you commit.
- Curve the ribs around the form. Yummy Mummy Kitchen has beginners draw curved ridges from the stem outward, bowing around the body. Curved ribs are what trick the eye into seeing a round, 3D pumpkin.
- Make the outline a little bumpy. Let the edge dip in slightly between each rib instead of staying a perfect oval. A few gentle bumps read as a real pumpkin.
- The common mistake: drawing a flat symbol. The Yummy Mummy Kitchen lesson warns against leaving the pumpkin as a plain oval and instead has students reshape it into a bumpy form with overlapping curved ribs, so it looks three-dimensional instead of like a flat sticker.
Fun variations to try
- Tall pumpkin: stretch your oval taller for a different variety, with longer, narrower ribs.
- Cute pumpkin: add round cheeks, big sparkly eyes, and a tiny smile for a friendly fall character.
- Stack of pumpkins: draw two or three pumpkins of different sizes piled together with a few leaves.
- Pumpkin patch: draw several pumpkins on a wavy ground line with curling vines and broad leaves between them.
- Glowing jack-o'-lantern: color the face yellow and add little light rays around it so it looks lit from inside.
Frequently asked questions
How do you draw an easy pumpkin? Start with a wide, light oval, add a curved center line, then draw curved ribs on each side that bow outward. Let the outline dip slightly between the ribs for a bumpy shape, add a chunky stem on top, then darken and color it.
How do you make a pumpkin look 3D? Use curved ribs that wrap around the body like stripes on a ball, not straight up-and-down lines. Then shade the dips between the ribs a little darker. The curves and the shadow together make the pumpkin look round.
How do you draw a jack-o'-lantern face? Draw two triangle eyes, a small triangle nose, and a wide grin with a couple of square gaps for missing teeth, all on the front center of the pumpkin. For a cute version, use round eyes and a gentle smile instead.
Keep drawing and coloring
That's it, you can draw a pumpkin and a jack-o'-lantern too. Keep the autumn theme going with more fall drawing ideas like leaves and acorns, then learn how to draw a turkey for the harvest table and how to draw a tree for a whole pumpkin patch scene. When you want a break, print our free nature coloring pages and color away. Have fun.