Learn how to draw a hibiscus the easy way, from a simple circle guide to five soft petals and a curling center. A beginner step-by-step, no experience needed.
A hibiscus looks tropical and fancy, but it starts from one easy shape: a circle. In this guide you'll learn how to draw a hibiscus one calm step at a time, building from a light guide circle out to five broad petals and a long, curling center stalk. No experience needed, and no special supplies. If you can draw a wobbly circle, you can draw a hibiscus.
We'll keep every line light at first so mistakes are easy to fix, then darken the lines you love at the end. This is the hibiscus drawing easy method, the same way teachers block in a flower. Grab a pencil and let's begin.
What you'll need
- A pencil (a soft 2B is nice, but any pencil works)
- An eraser
- Plain paper
- Optional: a black pen for outlining, plus crayons, markers, or colored pencils
How to draw a hibiscus step by step
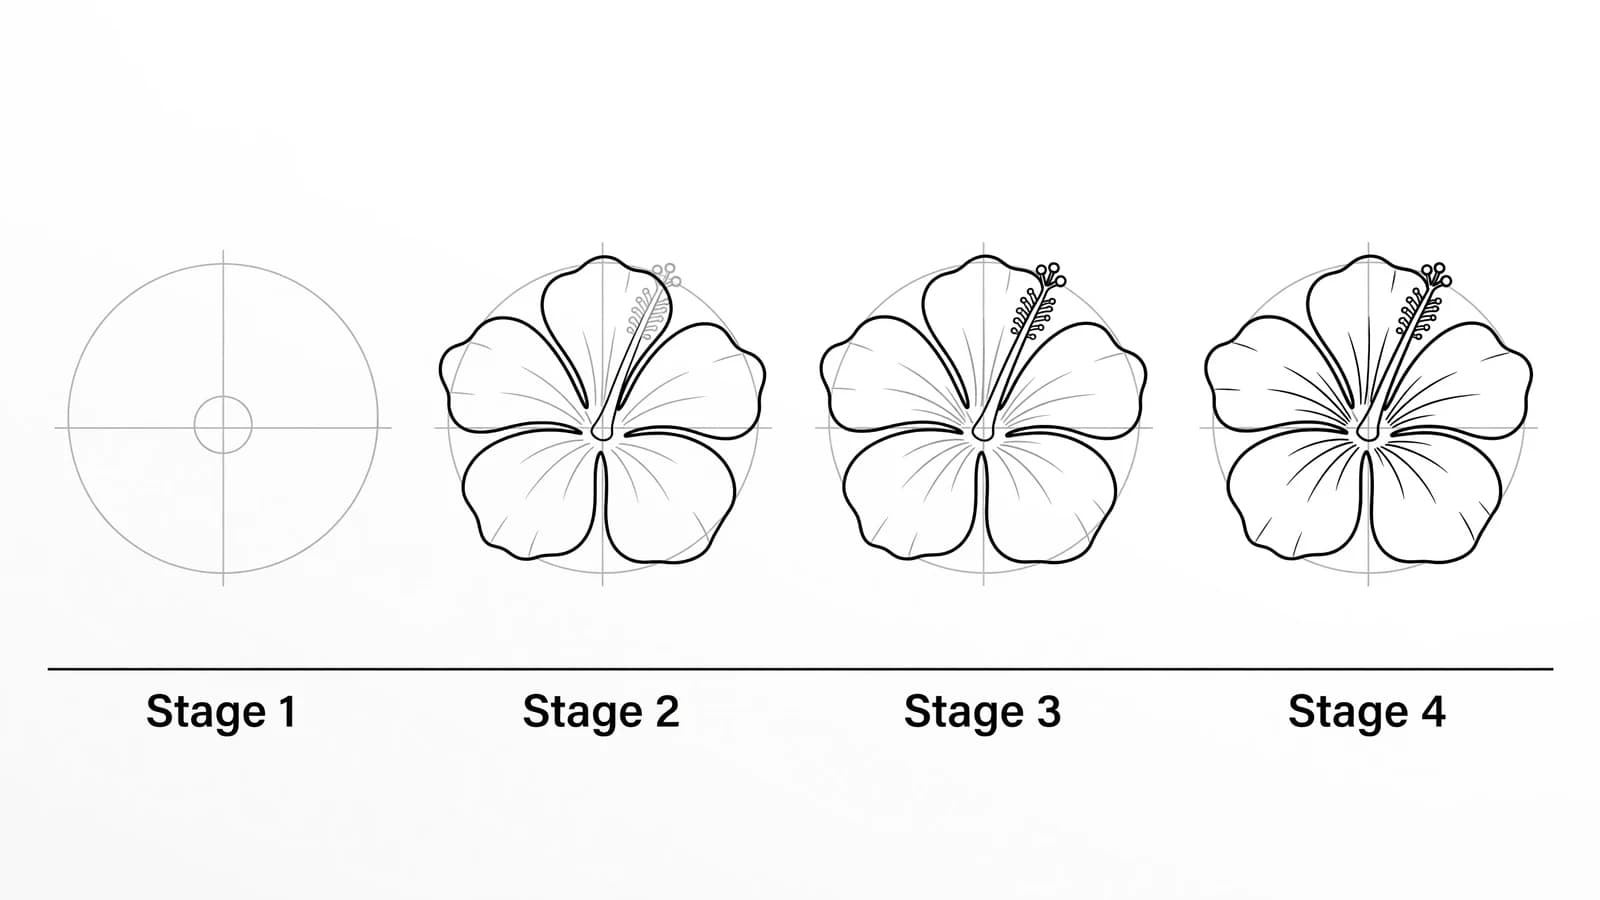
This is the foundation-first method most instructors teach: block in the big shape lightly, find the center, then grow the petals outward. The Sketch Club's step-by-step hibiscus tutorial starts by planning the shape and lightly sketching the stem and a small circle for the flower center before refining any petals. We'll do the same.
Step 1: Draw a light guide circle
Start in the middle of your paper and draw a soft, slightly squished circle. Press very lightly. This isn't part of the flower yet. It's just a guide for the size and tilt of your hibiscus, and you'll erase it later. Artist and instructor JeyRam teaches beginners to begin with exactly this kind of lightly sketched "squished" circle as a guideline for the size and tilt of the bloom.
Step 2: Mark the center
Inside the circle, a little off to one side, draw a tiny circle for the flower's center. This small dot is the anchor that all five petals will radiate from. Keep it light. Everything you draw next grows out from this point.
Step 3: Add five broad teardrop petals
From the center, draw five soft, broad petals spreading outward like a fan, each one a wide teardrop or rounded heart shape. Let them fill that guide circle. Don't worry about making them match. Real hibiscus petals are loose and wavy, so curvy, uneven edges look more natural than perfect ones.
Step 4: Give the petals their ruffled edges
Go back along the outer edge of each petal and add a few gentle bumps and waves. Hibiscus petals crinkle a little at the tips, like tissue paper. These small ruffles are what make the flower read as a hibiscus and not a daisy.
Step 5: Draw the long center stalk
From the little center circle, draw a single line that reaches out past the petals, like a curving antenna. This is the hibiscus's signature part. At the tip, add a small cluster of tiny dots or circles for the pollen, and add a few little dots along the stalk too.
Step 6: Add the stem and a leaf
Draw two lines coming down from behind the petals for the stem. Then add one pointed leaf on the side. A hibiscus leaf is an oval that comes to a point, with a center vein and a slightly jagged edge.
Step 7: Darken your favorite lines and erase the guides
Go over the lines you want to keep with a firmer stroke or a black pen. Then erase the guide circle and any stray marks. Your hibiscus suddenly looks finished. Add a few light curved lines inside each petal, fanning out from the center, to show the soft folds.
Step 8: Color it in
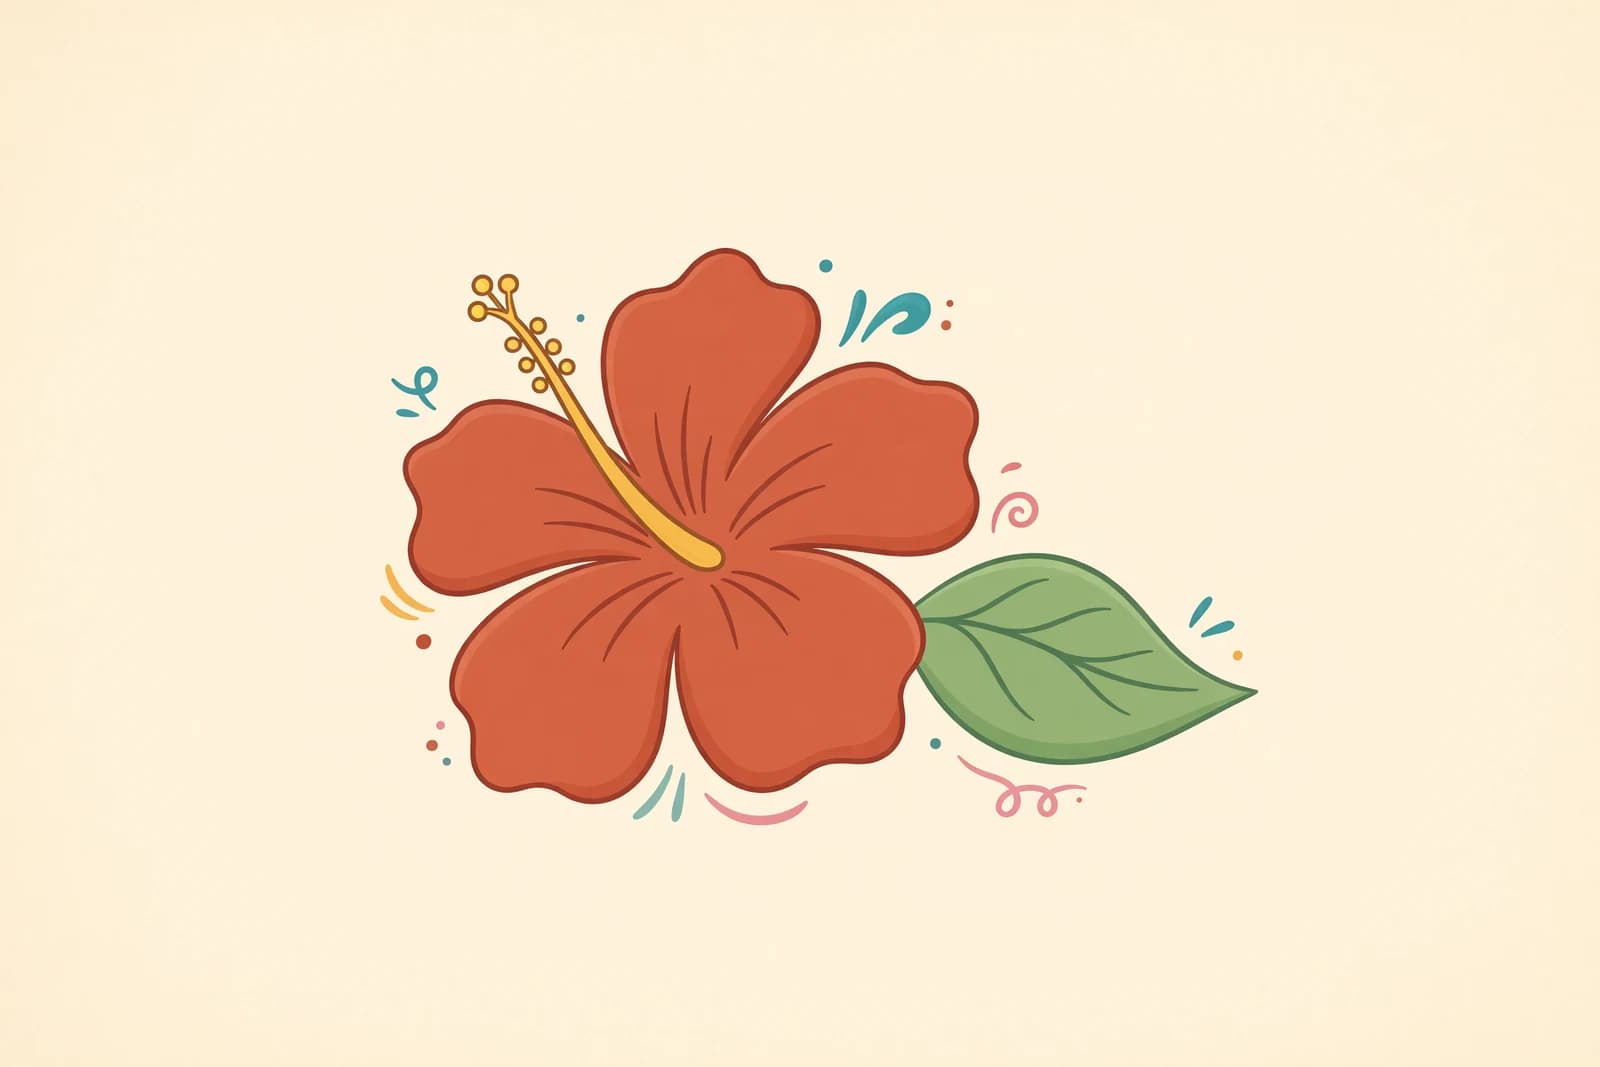
Hibiscus flowers come in bright reds, pinks, oranges, and yellows. Color the petals a little darker near the center and lighter toward the ruffled edges to give the bloom some depth. Color the center stalk yellow, and the stem and leaf green.
What artists recommend (and common mistakes)
The biggest tip from drawing teachers is to look closely and build from simple shapes before chasing details. Here is what that looks like in practice:
- Start with a light construction circle. JeyRam has beginners sketch a squished circle as a guideline for size and tilt first, then erase it once the petals are in. The guide keeps your whole flower the right shape.
- Anchor with the center, then radiate. The art team at Xencelabs tells beginners to start with a small circle for the flower center, then add five soft, broad teardrop petals radiating from it, focusing on loose, wavy outlines rather than perfect symmetry.
- Plan the shape and sketch lightly. The Sketch Club plans the composition and keeps early lines light before committing to petals and leaves. That is the fix for the most common beginner mistake: pressing too hard and committing dark, rigid outlines too soon, which makes any change a smudgy mess.
- Draw what you actually see. Art educator Betty Edwards, author of Drawing on the Right Side of the Brain, says in her official interview that "drawing teaches accurate perception—how to see what is really 'out there.'" Look at the real curve of a petal instead of the flower you picture in your head.
The more hibiscus you draw, the easier the next one gets. As Edwards stresses, drawing is "a teachable, learnable skill," so every quick practice bloom is training your eye and hand for the next.
Fun variations to try
- A simple hibiscus: Skip the ruffles and draw five smooth petals with one center stalk. Perfect for doodles and stickers.
- A tropical scene: Draw two or three hibiscus flowers together with big leaves for a beachy, Hawaiian look.
- A cute cartoon hibiscus: Give it round petals and a smiley face on the center for a kawaii sticker.
- A hibiscus from the side: Draw the petals as a trumpet shape opening toward you, with the stalk poking straight out the front.
Frequently asked questions
How do you draw a hibiscus for beginners? Start with a light guide circle, mark a tiny center inside it, then draw five broad teardrop petals radiating from that center. Add the long curling stalk last. Building outward from the center is the easiest method.
How many petals does a hibiscus have? A classic single hibiscus has five petals. Drawing five broad, slightly overlapping petals in a fan shape gives you the instantly recognizable look.
What makes a hibiscus look real? The two giveaways are the ruffled, wavy petal edges and the long center stalk poking out past the petals with a little pollen cluster at the tip. Add both and your flower reads as a hibiscus.
Keep drawing and coloring
Now that you can draw a hibiscus, grow a whole garden. Try our flower drawing ideas for more blooms to sketch, learn how to draw a rose next, or add a butterfly fluttering above your flowers. When you want a break, print our free nature coloring pages and color away. You've got this.