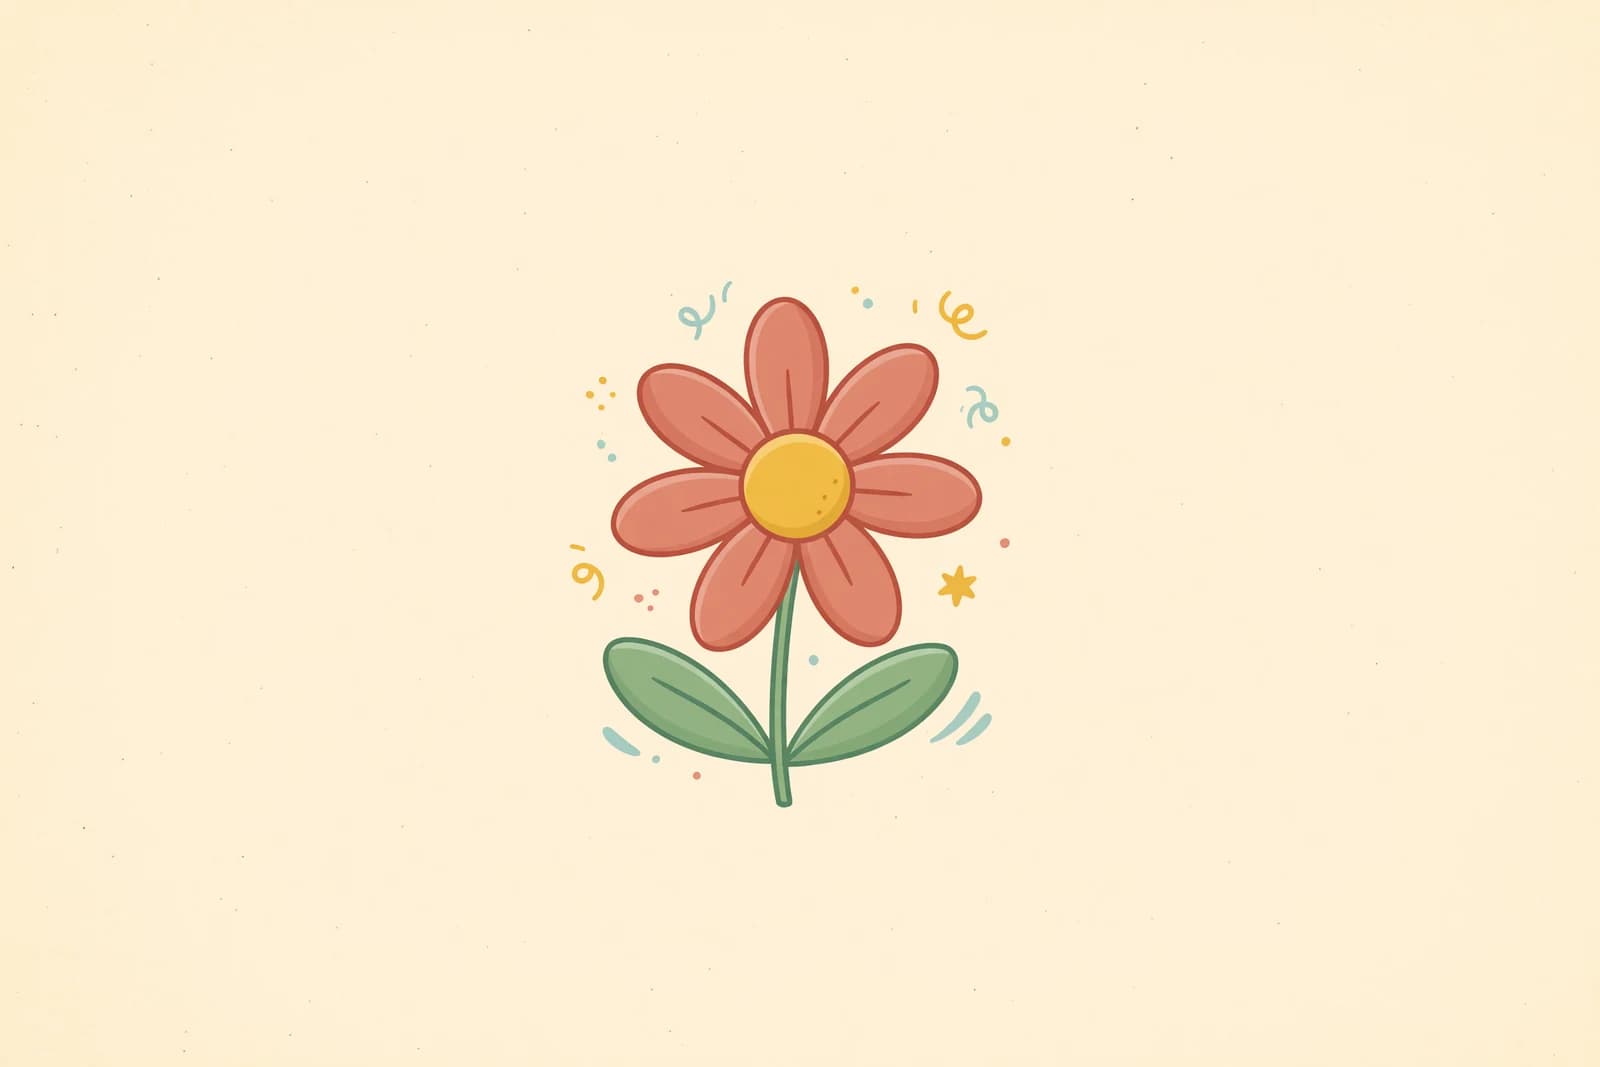
Learn how to draw a flower the easy way, starting from a simple center circle and a ring of petals. A beginner-friendly, step-by-step guide, no experience needed.
A flower is one of the friendliest things to draw, because it starts from shapes you already know: a circle and a few soft petals. In this guide you'll learn how to draw a flower one calm step at a time, building from the center outward the way real botanical artists do. This is an easy flower drawing with no experience needed and no fancy supplies. If you can draw a wobbly circle, you can draw a flower.
We'll keep every line light at first, so mistakes are simple to fix, then darken the lines you love at the end. Grab a pencil and let's begin.
What you'll need
- A pencil (a soft 2B is nice for light guide lines, but any pencil works)
- An eraser
- Plain paper
- Optional: a black pen for outlining, plus crayons, markers, or colored pencils
How to draw a flower step by step
This is the foundation-first method most teachers use: block in the big shapes lightly, then work from the center out. Draw Botanical, the online school founded by botanical artist Wendy Hollender, tells beginners to "observe the flower's structure carefully" and ask "What basic shape does it suggest?" before drawing a single petal. We'll do exactly that.
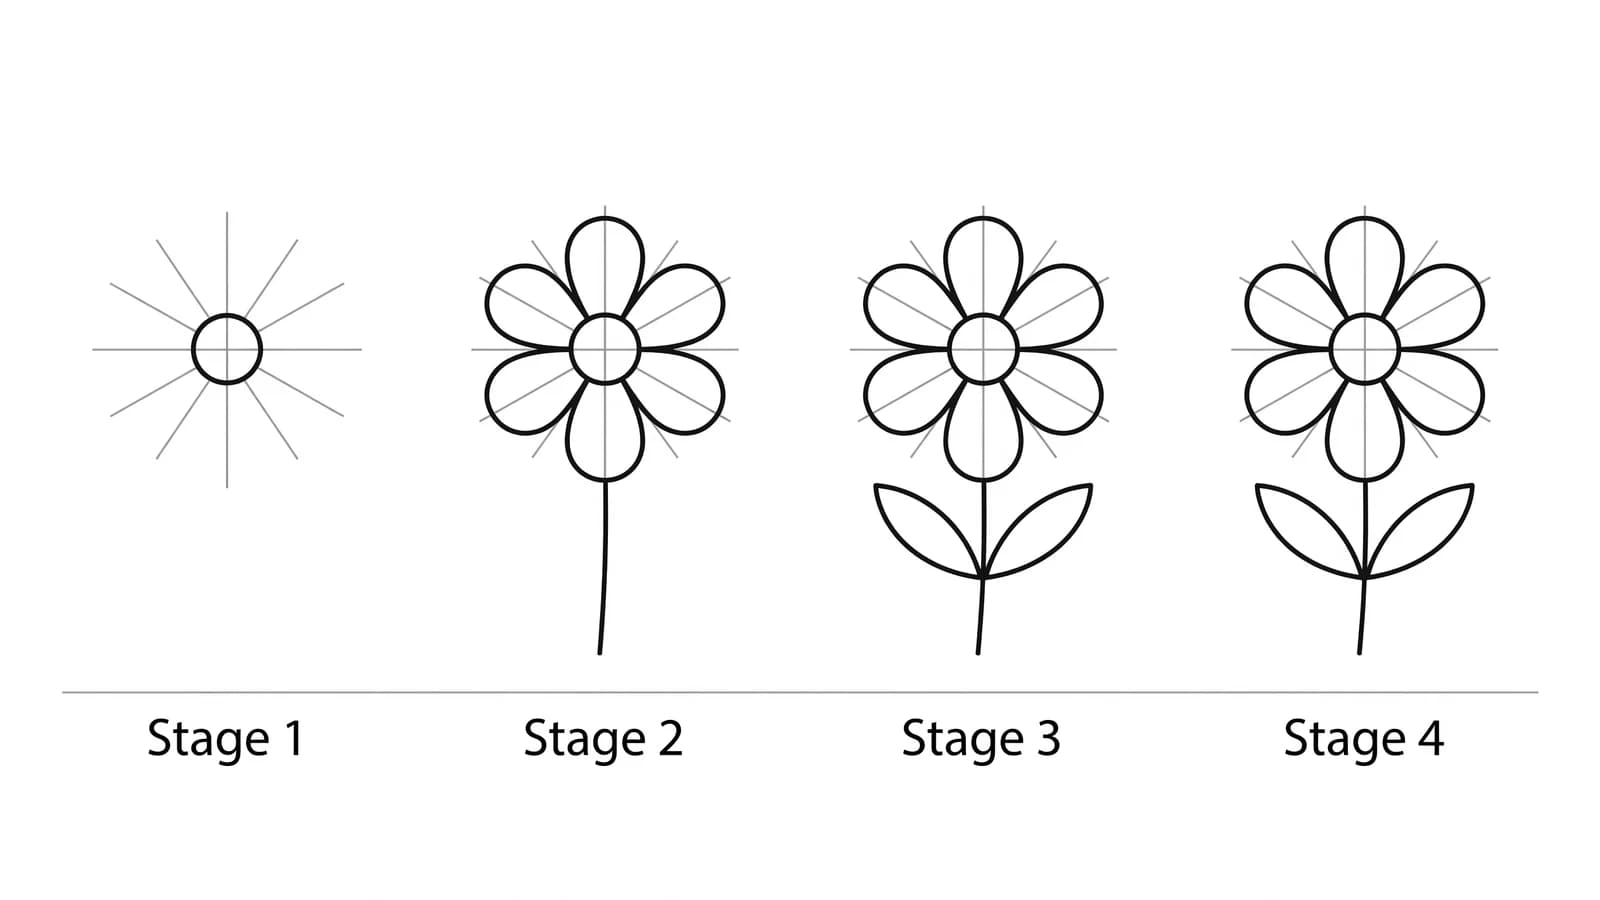
Step 1: Draw the center circle
Start in the middle of your paper and draw a small circle. This is the heart of the flower, the part the petals will wrap around. Press lightly so you can adjust it later. A little wobble is fine. Real flowers are never perfect.
Step 2: Add a light guide ring
Around the center circle, draw a bigger circle very lightly, like a faint halo. This ring marks how far your petals will reach. It keeps every petal about the same length, so your flower looks balanced instead of lopsided. You'll erase this line later, so keep it soft.
Step 3: Draw the first four petals
Think of a clock. Draw one petal pointing up, one down, one left, one right, each one a soft rounded shape that reaches out to the guide ring. Let the lines flow out from the center. Draw Botanical reminds beginners that a flower's petals all radiate from that central point, so anchor each petal at the center first and let getting the meeting point right matter more than getting every outer edge perfect.
Step 4: Fill in the petals between
Now add a petal in each gap, so you have eight petals all the way around. Stagger them so the new ones sit slightly behind the first four. This overlap is what makes a flower look full instead of flat. Keep your strokes light and short rather than one long outline.
Step 5: Add details to the center
Inside the center circle, draw a cluster of tiny dots or small circles. These are the seeds or pollen at the heart of the flower. A ring of little dots makes a daisy or sunflower look real in seconds. Add a few short lines fanning out from the center too, if you like.
Step 6: Draw the stem and leaves
Add two lines coming down from the bottom of the flower for the stem. Then draw one or two leaves on the sides. A leaf is a pointed oval with a center vein and a slightly jagged edge. Curve the stem a little so it looks like it's growing, not standing stiff.
Step 7: Darken your favorite lines and erase the rest
Go over the lines you want to keep with a firmer stroke or a black pen. Then erase the guide ring and any leftover marks peeking out. Your flower suddenly looks finished. Add a soft curved line down the middle of each petal to show the fold, and you're done.
Step 8: Color it in
Flowers come in every color, so have fun. Try yellow petals with a brown center for a sunflower, pink for a cosmos, or purple for a pansy. Color the petals a touch darker near the center and lighter at the tips to give the bloom some depth. Color the leaves and stem green.
What artists recommend (and common mistakes)
Drawing teachers agree on a few simple habits that make a flower look real instead of cartoonish. Here is what they teach:
- Look at a real flower, not the one in your head. Illustrator and educator Michaela Jean says, "Do your best to dismiss what you think or know a flower looks like and focus on what you actually see." A glance at a real bloom or a photo beats guessing every time.
- Build petals with short, light strokes. Instead of one bold outline, Michaela Jean suggests you "make shorter, quicker marks and allow the shape to build" so multiple little marks form the petal together. Light marks are also easy to erase.
- Start from basic shapes. Tulips are cup shapes, morning glories are funnels, daisies are circles with spokes. Draw Botanical and beginner classes that teach drawing "from simple shapes" both start here, because the big shape carries the whole drawing.
- The common mistake: hard cartoon outlines. Artists Network warns that beginners often leave each petal with a hard dark line all the way around. Instead, soften an edge by shading lightly into one side of the line, so it reads as a real edge rather than a sticker.
- Practice by repeating. Draw Botanical notes, "One of the best ways to improve is to draw the same flower multiple times, from different angles, focusing on a different aspect each time." Three small daisies teach you more than one careful one.
Fun variations to try
- Sunflower: make the center big and full of dots, then add two rings of pointed yellow petals around it.
- Tulip: skip the open petals and draw a single cup shape on a tall straight stem with long leaves.
- Rose: start with a little spiral in the center and wrap curling petals around it.
- Flower bouquet: draw three or four flowers at different heights and tie the stems together with a little bow.
Frequently asked questions
What is the easiest flower to draw? A daisy is the easiest, because it's just a center circle with simple oval petals around it. A tulip is a close second, since it's basically one cup shape on a stem.
How do I make my flower look more real? Look at a real flower or photo as you draw, build the petals with light short strokes, and shade one side of each petal a little darker so it has depth instead of a flat outline.
Do I need special pencils? No. Any pencil works for a first flower. A soft 2B pencil is nice because it makes light guide lines that erase cleanly, but a regular school pencil is perfectly fine.
Keep drawing and coloring
That's it, you can draw a flower. Once you've drawn one, try a whole garden, or print some art to color while you practice. Browse our nature coloring pages for flowers, leaves, and trees to fill in, grab fresh flower drawing ideas when you want a new bloom to try, and keep building your skills with our guides on how to draw a rose and how to draw a tree. Keep your pencil moving and have fun.